
Strategy added by Bumrusher
56
56
|
Average rating: |
4.5 |
|
Ratings: |
48 |
|
Your vote: |
|
Creator |
|||||||||
|---|---|---|---|---|---|---|---|---|---|
|
Tags
Filter strategies:
|
|||||||||


Any Level 1+ Pet
|

Time: 01:55 (14-15 rounds)
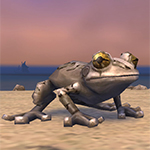
If you don't have Baa'l then try this strategy Inland Croaker breed recommendation: HH > HP > BB > PP/PS |
Level 1+ Script |
2 | 4.9 |
N/A | 55 |
115
1:55
|
14-15 | |

Any Level 1+ Pet
|
I found this strategy on Wowhead, posted by Kalkoh. Easy and fast. It did not fail yet.
Other breeds may work as well, I haven't tested them yet. |
Level 1+ Script |
2 | 4.5 |
N/A | 79 |
110
1:50
|
14 | |

Any Level 1+ Pet
Any Level 1+ Pet
|
Script thanks to ZoeyStarwind
|
Level 1+ Script |
2 | 4.5 |
N/A | 56 |
300
5:00
|
36+ | |

Any Level 1+ Pet
|
Time: 01:55 (15 rounds)
|
Level 1+ Script |
2 | 4.5 |
N/A | 13 |
130
2:10
|
15 | |
Any Level 1+ Pet
|
In this vast jungle, a low-hanging fruit isn't entirely unexpected.
While Immolation is much, much better for backline healing, I've found out Flamethrower adds a little more stability, as dropping a DoT later means it smoothes out the Burn's RNG. You can use Immolation first cast only, but you will risk Gyrexle healing out because Failsafe didn't trigger. I think it has something to do with different backline/weather abilities affecting the Gyrexle's health in a way that causes them to use Repair late/early enough. Managed to succeed with a crit of Rot. (A forfeit is for continued testing.) |
Breed Level 1+ Script |
2 | 5.0 |
N/A | 14 |
118
1:58
|
14 | |
Any Level 2+ Pet
|
|
Level 2+ Script |
2 | 4.0 |
N/A | 34 |
138
2:18
|
16 | |

Any Level 3+ Pet
|
OrionAssante
|
RNG Level 3+ Script |
2 | 3.5 |
N/A | 39 |
205
3:25
|
25+ | |


Any Level 10+ Pet
|
Cymre
|
Original video by Cymre
Script thanks to Shaka |
Shop Level 10+ Script |
2 | 3.7 |
N/A | 7 |
187
3:07
|
23+ |
Any Level 1+ Pet
|
Thanks to Wazzak for some log samples.
As usual, if WBL crits, this is over. :( Don't worry about your own RNG, and as the Idol of Decay is slower it can be swapped out even as it went into Damned. P/S and P/P imps should work too, but a custom judgment regarding throwing in Immolation again is required around its expiration. |
Breed Level 1+ Script |
2 | 0.0 |
N/A | 1 |
110
1:50
|
14 | |
Any Level 3+ Pet
|
This is a reliable strategy posted by Helbrecht of Eldrethalas on the US forums, Drrum on her blog, and Rythian on Wowhead, but the actual origin remains obscured at the moment of publication. Please comment with any details you might share.
I have also done this fight multiple times with Darkflame instead of Early Advantage. See which one you prefer. Your Level Pet has to be able to take a hit from Swarm of Flies (around 117 points). There is no backline damage during this fight. |
Breed Level 3+ |
2 | 0.0 |
N/A | 1 |
210
3:30
|
25+ | |

Any Level 1+ Pet

|
Level 1+ Script |
2 | 5.0 |
N/A | 3 |
208
3:28
|
29-30 | ||
|
Any Level 1+ Pet
|
I found this fairly recent strat on Wowhead https://www.wowhead.com/npc=83837/cymre-brightblade#comments, with thanks to creator daaani. It looks similar to another strat posted here, but this one worked perfectly for me.
NOTE: this only seemed to work with the P/P breed Crab. Had no success with the H/H breed. |
Breed Level 1+ Unobtainable |
2 | 5.0 |
N/A | 2 |
195
3:15
|
21 | |

Any Level 1+ Pet
|
Original strategy comes from Sp1naker on Wowhead
Note if using an undead pet the minimum health must be 176. You can set the minimum health in Rematch to 118 and expected damage type to critter to account for this. |
Breed RNG Level 1+ Script |
2 | 3.8 |
N/A | 5 |
190
3:10
|
23 | |


Any Level 1+ Pet
|
Borrowed from one of Xu-Fu's options for An Awfully Big Adventure, modified for lvl pet.
|
Level 1+ Script |
2 | 1.0 |
N/A | 1 |
340
5:40
|
38+ | |
|
Any Level 6+ Pet
|
This strategy has worked for me since Broken Isles and never failed. You can do this with one Puddle Terror and 2 lvling pets using Sunlight and Natures Ward but it takes a lot longer to do'
|
Level 6+ |
2 | 0.0 |
N/A | 0 |
240
4:00
|
25+ | |
Any Level 1+ Pet
|
~21 rounds
Breed recommendation Slot 2: H/S >> S/B >> S/S, P/S |
Breed Level 1+ Script |
2 | 0.0 |
N/A | 0 |
180
3:00
|
21 | |

|
I only tried this twice, it worked 2nd time and first time I jumped the gun and foolishly swapped to Sunfire Kalari while my Beetle was still alive. Considering how well the pets were doing I expect them to win more than half the time.
|
RNG |
2 | 0.0 |
N/A | 0 |
180
3:00
|
20+ | |
|
|
I'd like to start off by saying that the suggested strategy using Puddle Terror is by far the safest strategy out there, i was able to solo it with just Sunlight/Nature's Ward, killing off the back line entirely during the first encounter.
And considering that the pet is very cheap on AH, there's hardly any excuse not to use that strategy. But for this one, i was basically messing around to bring back a little bit of a challenge, while also playing it safe. This strategy is not THE strategy by any means, it's just a variation of the known working tropes. |
RNG |
2 | 0.0 |
N/A | 0 |
171
2:51
|
22+ | |

|
extremely consistent; can use any dragonkin w/ Scorched Earth & Breath in place of Wild Crimson Hatchling.
|
2 | 1.0 |
N/A | 0 |
145
2:25
|
16+ |
Incl. steps:


Any Level 1+ Pet
>120 |

Any Level 1+ Pet
>120 |
Script thanks to ZoeyStarwind
| Before | After | Experience Gain | |
|---|---|---|---|
| 1 | ➜ | 13 | 5981 |
| 2 | ➜ | 13 | 6353 |
| 3 | ➜ | 14 | 6683 |
| 4 | ➜ | 14 | 6971 |
| 5 | ➜ | 14 | 7219 |
| 6 | ➜ | 15 | 7425 |
| 7 | ➜ | 15 | 7590 |
| 8 | ➜ | 16 | 7714 |
| 9 | ➜ | 16 | 7796 |
| 10 | ➜ | 17 | 7838 |
| 11 | ➜ | 17 | 7838 |
| 12 | ➜ | 18 | 7796 |
| 13 | ➜ | 19 | 7714 |
| 14 | ➜ | 19 | 7590 |
| 15 | ➜ | 20 | 7425 |
| 16 | ➜ | 20 | 7219 |
| 17 | ➜ | 21 | 6971 |
| 18 | ➜ | 22 | 6683 |
| 19 | ➜ | 22 | 6353 |
| 20 | ➜ | 23 | 5981 |
| 21 | ➜ | 23 | 5569 |
| 22 | ➜ | 24 | 5115 |
| 23 | ➜ | 25 | 3900 |
| 24 | ➜ | 25 | 1980 |
|
Safari Hat |
|
|
Lesser Pet Treat |
|
|
Pet Treat |
|
|
Darkmoon Hat |
|
|
Pet Battle Week |
|
= |
Pet levels to 25 with minimal XP lost |
|
|
= |
Additional XP above level 25 is lost |
|
For the best display of your strategy, please follow these guidelines:


For the best display of your strategy, please follow these guidelines:
For the best display of your strategy, please follow these guidelines:
For the best display of your strategy, please follow these guidelines:
For the best display of your strategy, please follow these guidelines:
For the best display of your strategy, please follow these guidelines:
For the best display of your strategy, please follow these guidelines:
For the best display of your strategy, please follow these guidelines:
For the best display of your strategy, please follow these guidelines:
For the best display of your strategy, please follow these guidelines:
For the best display of your strategy, please follow these guidelines:
For the best display of your strategy, please follow these guidelines:
For the best display of your strategy, please follow these guidelines:
For the best display of your strategy, please follow these guidelines:
For the best display of your strategy, please follow these guidelines:
 Nature's Ward
For the best display of your strategy, please follow these guidelines:
For the best display of your strategy, please follow these guidelines:
For the best display of your strategy, please follow these guidelines:
For the best display of your strategy, please follow these guidelines:
For the best display of your strategy, please follow these guidelines:

One of the hardest fights in Draenor. It is not suitable to use for leveling a pet as it takes way too long and is unreliable.

 Sunlight
 Punch
Punch
0
Ceci wrote on 2023-12-13 05:47:24
1
Raindawn
wrote on 2023-07-03 01:14:47
8
ZoeyStarwind#1524
wrote on 2021-03-26 01:46:08
change(#2) [self.round == 3 && !self(#2).played]
change(#3) [self(#2).active]
change(Puddle Terror:1568) [self(#3).active]
use(Sunlight:404) [!enemy(Idol of Decay:1443).aura(Dark Rebirth:795).exists]
use(Nature's Ward:574) [!self.aura(Nature's Ward:820).exists]
use(Punch:111) [!enemy(Idol of Decay:1443).active]
use(Punch:111) [enemy(Wishbright Lantern:1444).hp < 309 && !enemy(Idol of Decay:1443).aura(Dark Rebirth:795).exists]
use(Nature's Ward:574)
1
SilkCharm
wrote on 2021-04-14 14:45:44
1
Cilla513
wrote on 2021-12-07 13:36:33
1
flit
wrote on 2022-03-09 09:51:54
2
Rinike
wrote on 2023-05-13 08:58:12
0
TBird wrote on 2023-03-29 16:25:14
1
Tormentia
wrote on 2022-05-11 19:42:57
3
Rinoe#2501
wrote on 2021-01-06 15:19:54
TD script (should work, did some changes after the fight so haven't been able to test it):
use(Nature's Ward:574) [enemy.aura(Dark Rebirth:794).exists]
use(Sunlight:404)
change(#2) [round=2]
change(#3) [round=3]
change(#1) [round=4]
use(Punch:111) [enemy(#2).dead & enemy(#3).dead]
use(Nature's Ward:574)
quit [self(#1).dead]
I added a quit if your Puddle Terror should die. (edited)
0
MisterMan wrote on 2021-11-24 14:21:51
----------------------Begin TD Script-----------------------
use(Nature's Ward:574) [enemy.aura(Dark Rebirth:794).exists]
use(Sunlight:404)
change(#2) [round=3]
change(#3) [round=4]
change(#1) [round=5]
use(Nature's Ward:574) [!self.aura(Nature's Ward:820).exists]
use(Punch:111) [enemy(#2).dead & enemy(#3).dead]
quit [self(#1).dead]
standby
-----------------------End TD Script------------------------ (edited)
1
kallasha
wrote on 2021-08-18 06:05:57
1
Vexleigh
wrote on 2021-08-15 04:30:53
By the way, I've been keeping track of when Idol of Decay uses Dark Rebirth.
274 health = Dark Rebirth
279 health = no Dark Rebirth
May this data be helpful to you all.
Edit: Never mind, Idol just cast Dark Rebirth at 383 health. The above numbers may be specific to the Anubisath Idol/carry pet/Mechanical Pandaren Dragonling strat I've been using up to now. (edited)
1
Johanga#2233
wrote on 2021-01-12 05:54:44
1
Dende
wrote on 2020-12-29 14:32:24
This one did not fail at all, in fact, Idol is never gonna kill the Puddle Terror at all if you do it correctly.
With that said, I did it so that I kept repeating step 8 to 13 until actually both the Gnome and the Lantern died in the background, I even had let the Idol getting a ressurection, honestly it was so easy that even this ressurection did not bother me at all, when he did I used Punch until he was dead and when I won my Puddle Terror literally had full hp.
0
Astriara wrote on 2020-12-04 20:29:38
1
Fisshy#2428
wrote on 2020-12-29 13:35:58
1
Dende
wrote on 2020-12-29 14:19:50
2
JimmiBoYY#6578
wrote on 2020-12-27 02:27:48
1
Articca#2843
wrote on 2022-07-21 01:24:54
1
Mazwak
wrote on 2023-05-13 11:52:02
change(#2) [round=3]
change(#3) [round=4]
change(#1) [round=5]
if [enemy(Idole de putréfaction:1443).active]
use(Protection de la Nature:574) [aura(#795).exists]
use(Coup de poing:111) [enemy(Idole de putréfaction:1443).hp<300]
use(Beau fixe:404)
use(Protection de la Nature:574)
endif
if [enemy(Gyrexle, le Mécano éternel:1424).active]
use(Protection de la Nature:574) [aura(#666).exists]
use(Beau fixe:404)
use(Coup de poing:111)
endif
use(Coup de poing:111)
1
andrei_gus
wrote on 2023-08-10 16:12:42
use(Nature's Ward:574) [enemy.aura(Dark Rebirth:794).exists]
use(Sunlight:404)
change(#2) [round=3]
change(#3) [round=4]
change(#1) [round=5]
use(Nature's Ward:574) [!self.aura(Nature's Ward:820).exists]
use(Punch:111) [enemy(#2).dead & enemy(#3).dead]
quit [self(#1).dead]
standby
New Comment: