
Strategy added by Jagûar
|
Average rating: |
5 |
|
Ratings: |
1 |
|
Your vote: |
|
Creator |
|||||||||
|---|---|---|---|---|---|---|---|---|---|
|
Tags
Filter strategies:
|
|||||||||

|

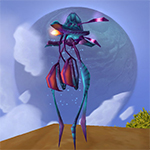
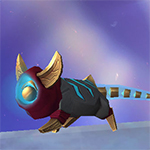
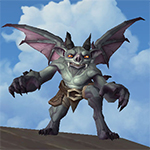
Bloodgazer Team Rumble
Turn 14 - Scenario 1: (Skitter) - Must crit for at least 1085 dmg to make the rest as smooth as possible. Strategy scenarioes tested and passed: January 9th 2019, original strategy partially changed to Scenario 1, added a Scenario 2 as well. |
Breed |
2 | 5.0 |
N/A | 1 |
120
2:00
|
17 | |

|
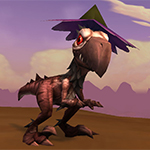
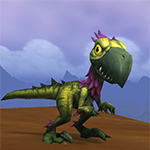
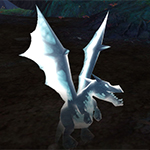
Direbeak Team Rumble
Slightly RNG dependent Complete Strategy overhaul Tested and passed: January 9th 2019, |
RNG |
2 | 5.0 |
N/A | 0 |
175
2:55
|
26 | |
|
Script |
2 | 5.0 |
N/A | 2 |
115
1:55
|
17 | ||
|
Script |
2 | 5.0 |
N/A | 0 |
105
1:45
|
15 | ||

|
If Scorched Earth misses on round 4 (10% chance) it's probably best to restart. I haven't had it happen, so I'm not sure if the strat is still viable if this occurs.
|
Script |
2 | 5.0 |
N/A | 0 |
115
1:55
|
13+ | |
|
Script |
2 | 5.0 |
N/A | 0 |
120
2:00
|
18 | ||

|
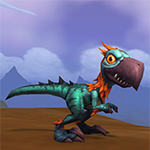
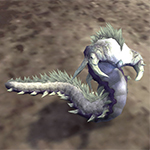
Snowfeather Team Rumble
IMPORTANT: You want Ghastly Kid to help soak the incoming damage from Rock Lobster's Carpnado, because you need Snowfeather Hatchling to stay alive in the backline, so using Etheral on Ghastly Kid before Carpnado comes off cooldown isn't a mistake. It's completely intentional to block one Infected Claw. Timing is everything. Strategy changed, tested and passed: January 9th 2019 |
Breed |
2 | 3.3 |
N/A | 4 |
165
2:45
|
25 | |

|
Sharptalon Team Rumble
Strategy tested and passed: January 9th 2019, no changes made |
RNG |
2 | 3.0 |
N/A | 0 |
125
2:05
|
21 |
Incl. steps:


Direbeak Team Rumble
Slightly RNG dependent
Complete Strategy overhaul
Tested and passed: January 9th 2019,
| Before | After | Experience Gain | |
|---|---|---|---|
| 1 | ➜ | 13 | 5981 |
| 2 | ➜ | 13 | 6353 |
| 3 | ➜ | 14 | 6683 |
| 4 | ➜ | 14 | 6971 |
| 5 | ➜ | 14 | 7219 |
| 6 | ➜ | 15 | 7425 |
| 7 | ➜ | 15 | 7590 |
| 8 | ➜ | 16 | 7714 |
| 9 | ➜ | 16 | 7796 |
| 10 | ➜ | 17 | 7838 |
| 11 | ➜ | 17 | 7838 |
| 12 | ➜ | 18 | 7796 |
| 13 | ➜ | 19 | 7714 |
| 14 | ➜ | 19 | 7590 |
| 15 | ➜ | 20 | 7425 |
| 16 | ➜ | 20 | 7219 |
| 17 | ➜ | 21 | 6971 |
| 18 | ➜ | 22 | 6683 |
| 19 | ➜ | 22 | 6353 |
| 20 | ➜ | 23 | 5981 |
| 21 | ➜ | 23 | 5569 |
| 22 | ➜ | 24 | 5115 |
| 23 | ➜ | 25 | 3900 |
| 24 | ➜ | 25 | 1980 |
|
Safari Hat |
|
|
Lesser Pet Treat |
|
|
Pet Treat |
|
|
Darkmoon Hat |
|
|
Pet Battle Week |
|
= |
Pet levels to 25 with minimal XP lost |
|
|
= |
Additional XP above level 25 is lost |
|
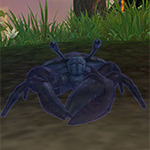
 Clobber - Living Pool is swapped out
For the best display of your strategy, please follow these guidelines:


For the best display of your strategy, please follow these guidelines:
For the best display of your strategy, please follow these guidelines:
For the best display of your strategy, please follow these guidelines:
For the best display of your strategy, please follow these guidelines:
For the best display of your strategy, please follow these guidelines:
 Lift-Off - Tia Mia and Larry dies
For the best display of your strategy, please follow these guidelines:
For the best display of your strategy, please follow these guidelines:
For the best display of your strategy, please follow these guidelines:
 Slicing Wind - Harpy Youngling dies
For the best display of your strategy, please follow these guidelines:
For the best display of your strategy, please follow these guidelines:
For the best display of your strategy, please follow these guidelines:
 Fish Slap - it's 5, if you count rounds instead of turns
For the best display of your strategy, please follow these guidelines:
For the best display of your strategy, please follow these guidelines:
For the best display of your strategy, please follow these guidelines:
For the best display of your strategy, please follow these guidelines:
For the best display of your strategy, please follow these guidelines:
For the best display of your strategy, please follow these guidelines:
For the best display of your strategy, please follow these guidelines:
For the best display of your strategy, please follow these guidelines:
For the best display of your strategy, please follow these guidelines:
Fish Slap - Rock Lobster dies and resurrectsFor the best display of your strategy, please follow these guidelines:
For the best display of your strategy, please follow these guidelines:
For the best display of your strategy, please follow these guidelines:

Hissssss!


 Flyby
Flyby Bubble
1
Lucetia
wrote on 2022-07-16 08:31:44
1
Placid
wrote on 2021-03-08 21:27:50
(On the 1st try Living Pool died too early, after 4 slaps, I guess Squirky Health was too low because of that).
1
Tigra wrote on 2017-04-10 02:18:53
0
Ursus wrote on 2017-04-15 04:56:10
0
Vanadia wrote on 2017-12-17 08:24:08
1
Turowai
wrote on 2018-07-15 16:14:18
1
Ahdra
wrote on 2018-10-23 05:19:06
-3
Ziast wrote on 2017-12-17 22:31:43
3
Kimberleigh wrote on 2018-03-18 00:49:00
-1
Нямко wrote on 2017-12-03 10:49:17
2) Вторым петом я выпустила детеныша живодера (1-2-1). Им же у меня получилось убить и третьего пета.
Злобоклюв на подстраховке.
0
Angel wrote on 2017-06-08 09:18:32
0
Anonymous wrote on 2017-05-15 17:17:34
1st - after Ore eater dies i summoned Lil'bad wolf and used dodge on whirlpool - Howl and Claw
Tia Mia and Larry dies
Rock Lobster comes in
Turn 1 - Claw
Turn 2 - Claw
Turn 3 - Dodge
Turn 4 - Howl
Turn 5 - Claw -> lil'bad wolf dies here or next turn. Im not too sure
bring Direbeak Hatchling
turn 6 - Ironskin
turn 7 - Warning Squawk
turn 8-x - Savage talon until rock lobster dies
New Comment: